问题描述
我必须格式化整个磁盘并重新安装 Ubuntu。
我在当前系统上安装了很多软件。我也必须重新安装所有这些更新、驱动程序和应用程序。
有什么方法可以制作我安装的 Ubuntu 的 .iso 映像以及其中的所有软件、首选项、驱动程序等吗?
有什么方法可以备份我的整个操作系统以及它的所有软件、驱动器、更新等等?
最佳思路
您可以做的是备份您的主目录并保存您已安装的所有软件包的列表。要保存已安装软件的列表,请使用以下命令:
sudo dpkg --get-selections > package_list
这将创建一个文件,其中包含该系统上安装的所有包/软件的列表。您需要将此文件备份到安全的地方。
然后,当您在机器上重新安装 ubuntu 时,您可以使用以下命令安装所有这些软件
sudo dpkg --set-selections < packages_list
这个命令不会安装任何东西。它只会标记要安装的软件包。要安装它们,请运行以下命令:
sudo apt-get -u dselect-upgrade
这需要一些时间才能完成,因为您的系统将下载并安装所有软件包。此命令完成后,将当前主目录替换为您之前备份的主目录。
希望这可以帮助
次佳思路
我回答“如何定制实时 Ubuntu CD?”使用一种从当前安装创建实时 CD 的方法。这意味着您无需再次下载所有软件包。本指南可能看起来又长又难,但主要是 “follow along” 和“复制粘贴”。在这里,复制并编辑了一下:
从现有/新安装创建 Live CD
一个好的方法是从当前安装制作一张 live CD。这可以使用虚拟机完成(只是不要在来宾操作系统中安装任何 VM 工具)
所以,首先我们需要一个全新的安装(如果你不能真正安装它,尝试使用虚拟机),只包含你需要的东西(在你的情况下是 Thunderbird、samba 和 ssh)。然后我们调整系统并记录调整的位置(例如,您更改桌面背景,设置在 ~/.gconf 中,或者您添加 firefox 快捷方式,它们位于 ~/Desktop 中)。这是第 4 步所需要的。
-
设置一些变量:
export WORK=~/temp
export CD=~/livecd
export FORMAT=squashfs
export FS_DIR=casper
将 ~/temp 替换为我们将在其中工作的临时目录的路径。将 ~/livecd 替换为 CD 树的路径。
-
制作文件夹结构。
sudo mkdir -p ${CD}/{${FS_DIR},boot/grub} ${WORK}/rootfs -
现在我们需要安装一些包:
sudo apt-get install grub2 xorriso squashfs-tools -
现在我们将复制当前安装,修改排除标志以满足您的需要:
sudo rsync -av --one-file-system --exclude=/proc/* --exclude=/dev/* \
--exclude=/sys/* --exclude=/tmp/* --exclude=/home/* --exclude=/lost+found \
--exclude=/var/tmp/* --exclude=/boot/grub/* --exclude=/root/* \
--exclude=/var/mail/* --exclude=/var/spool/* --exclude=${WORK}/rootfs \
--exclude=/etc/fstab --exclude=/etc/mtab --exclude=/etc/hosts \
--exclude=/etc/timezone --exclude=/etc/shadow* --exclude=/etc/gshadow* \
--exclude=/etc/X11/xorg.conf* --exclude=/etc/gdm/custom.conf \
/ ${WORK}/rootfs
如果您有单独的引导分区,请执行以下命令:
sudo cp -av /boot/* ${WORK}/rootfs/boot如果要复制用户配置和文件,请根据需要修改此列表: CONFIG=’.config .gconf Desktop someotherfolder andanotherfolder’ 现在我们复制您的配置和文件:cd ~ && for i in $CONFIG do sudo cp -rpv --parents $i ${WORK}/rootfs/etc/skel done -
现在我们 chroot 进入新系统并对其进行修改。
sudo mount  --bind /dev/ ${WORK}/rootfs/dev
sudo mount -t proc proc ${WORK}/rootfs/proc
sudo mount -t sysfs sysfs ${WORK}/rootfs/sys
sudo mount -t devpts devpts ${WORK}/rootfs/dev/pts
sudo chroot ${WORK}/rootfs /bin/bash
接下来的命令在 chroot 中完成:
LANG=
apt-get update
apt-get install casper
Casper 包含实时脚本。现在安装程序(gnome 版本) apt-get install ubiquity ubiquity-frontend-gtk 或者如果你想要 KDE:
apt-get install ubiquity ubiquity-frontend-kde -
更新 modules.dep 和 initramfs:
depmod -a $(uname -r) update-initramfs -u -k $(uname -r) -
移除非系统用户——不用担心,我们已经将设置和数据复制到用户的 “skeleton” 中。这意味着所有新用户都将拥有它们。
for i in `cat /etc/passwd | awk -F":" '{print $1}'` do uid=`cat /etc/passwd | grep "^${i}:" | awk -F":" '{print $3}'` [ "$uid" -gt "999" -a "$uid" -ne "65534" ] && userdel --force ${i} 2>/dev/null done -
清理:
apt-get clean find /var/log -regex '.*?[0-9].*?' -exec rm -v {} \; find /var/log -type f | while read file do cat /dev/null | tee $file done rm /etc/resolv.conf /etc/hostname -
退出 chroot。
exit -
现在,我们复制内核:
export kversion=`cd ${WORK}/rootfs/boot && ls -1 vmlinuz-* | tail -1 | sed 's@vmlinuz-@@'` sudo cp -vp ${WORK}/rootfs/boot/vmlinuz-${kversion} ${CD}/boot/vmlinuz sudo cp -vp ${WORK}/rootfs/boot/initrd.img-${kversion} ${CD}/boot/initrd.img sudo cp -vp ${WORK}/rootfs/boot/memtest86+.bin ${CD}/boot -
这样安装程序就不会安装 casper 之类的东西:
sudo chroot ${WORK}/rootfs dpkg-query -W --showformat='${Package} ${Version}\n' | sudo tee ${CD}/${FS_DIR}/filesystem.manifest sudo cp -v ${CD}/${FS_DIR}/filesystem.manifest{,-desktop} REMOVE='ubiquity casper user-setup os-prober libdebian-installer4' for i in $REMOVE do sudo sed -i "/${i}/d" ${CD}/${FS_DIR}/filesystem.manifest-desktop done -
卸载我们已安装的内容:
sudo umount ${WORK}/rootfs/proc sudo umount ${WORK}/rootfs/sys sudo umount ${WORK}/rootfs/dev/pts sudo umount ${WORK}/rootfs/dev -
转换为 squashfs:
sudo mksquashfs ${WORK}/rootfs ${CD}/${FS_DIR}/filesystem.${FORMAT} -
制作文件系统大小:
echo -n $(sudo du -s --block-size=1 ${WORK}/rootfs | tail -1 | awk '{print $1}') | sudo tee ${CD}/casper/filesystem.size -
和md5:
find ${CD} -type f -print0 | xargs -0 md5sum | sed "s@${CD}@.@" | grep -v md5sum.txt |sudo tee ${CD}/md5sum.txt -
现在 grub.cfg:
sudo nano ${CD}/boot/grub/grub.cfg(用你最喜欢的文本编辑器替换 nano,没关系)粘贴并保存:
set default="0" set timeout=10 menuentry "Ubuntu GUI" { linux /boot/vmlinuz boot=casper quiet splash initrd /boot/initrd.img } menuentry "Ubuntu in safe mode" { linux /boot/vmlinuz boot=casper xforcevesa quiet splash initrd /boot/initrd.img } menuentry "Ubuntu CLI" { linux /boot/vmlinuz boot=casper textonly quiet splash initrd /boot/initrd.img } menuentry "Ubuntu GUI persistent mode" { linux /boot/vmlinuz boot=casper boot=casper persistent quiet splash initrd /boot/initrd.img } menuentry "Ubuntu GUI from RAM" { linux /boot/vmlinuz boot=casper nopersistent toram quiet splash initrd /boot/initrd.img } menuentry "Check Disk for Defects" { linux /boot/vmlinuz boot=casper integrity-check quiet splash initrd /boot/initrd.img } menuentry "Memory Test" { linux16 /boot/memtest86+.bin } menuentry "Boot from the first hard disk" { set root=(hd0) chainloader +1 } -
制作 CD/DVD!
sudo grub-mkrescue -o ~/live-cd.iso ${CD} -
使用虚拟机进行测试!
所有功劳归于 capink,因为该指南来自 here 。
第三种思路
有多种方法可以做到这一点。最简单的一种是使用 remastersys
sudo remastersys dist
在使用 remastersys 之前,您应该安装 ubiquity 包
或者你可以使用 fsarchiver , redo-backup (A live cd)
How to backup your operating system
第四种思路
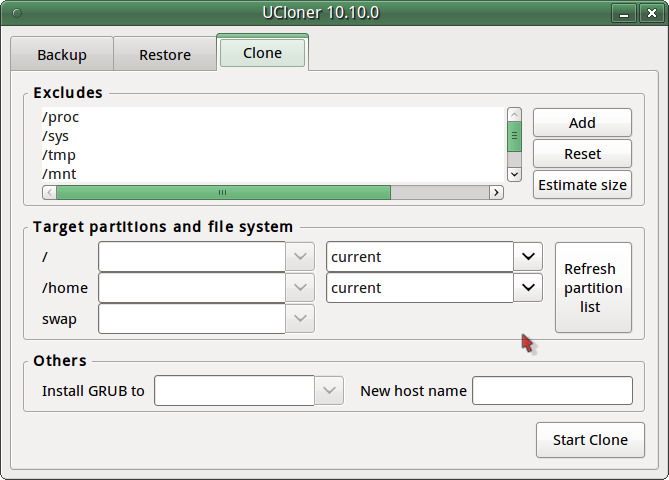
在国内,有朋友在Ubuntu中使用ucloner来备份操作系统。
https://code.google.com/p/ucloner/
UCloner is a backup/restore/clone tool designed for Ubuntu Linux. In some way it’s just like Norton Ghost for Windows.
With UCloner you can backup your Ubuntu system to a squashfs image file. Directly from this image file you can boot up a PC into a so-called “Live Ubuntu” environment (need “casper” package).
An active ubuntu system can clone itself into a/some target partition(s) with the help of UCloner. Remember Agent Smith in Matrix ? yeah, that’s it.
It has both command line and graphical interface. It’s more flexible when running in command line interface.
UCloner is free software, distributed under GPL v2.
第五种思路
如果您在单个硬盘上安装了 Ubuntu,并且您有另一个相同或更大存储容量的硬盘,那么克隆磁盘非常简单:
sudo dd if=/<from disk> of=<to disk>
因此,例如,如果您想将 sda 克隆到 sdb,那么您将执行 sudo dd if=/dev/sda of=/dev/sdb 。这将保留所有分区、引导管理器等。
小心使用正确的 if(输入文件)和 of(输出文件)。输入文件是您要复制的磁盘。如果您切换顺序,那么您会将空磁盘克隆到完整磁盘上,这将留下两个空白磁盘。 🙂
还要确保新磁盘有足够的空间来克隆第一个磁盘。否则最后只会被砍掉。不会有任何警告。
如果要创建图像,只需将 of=/dev/sdb 替换为 of=/some_place/disk-image.raw 。将其存储在另一个磁盘上。