目的
了解有关系统化紧急和救援目标以及如何将系统引导到其中的信息
要求
- 无特殊要求
困难
简单
约定
介绍
如今,Systemd已成为事实上的标准init system适用于所有主要的Linux发行版。
取代SysV和新贵,它也取代了定义系统的经典方式runlevels,使用系统targets,是一种特殊的unit。
在本教程中,我们将看到如何将Ubuntu 18.04系统引导到emergency和rescue系统目标,以及它们为用户提供什么样的环境。
系统目标与经典运行级别
Systemd引入了targets它取代了经典的系统运行级别。
举个例子,runlevel在SysV中,代表
0halt机器状态,等于系统状态poweroff目标。
同样,runlevel 1要么single user mode在rescue目标。
最后,分别用于图形模式和重新引导系统的运行级别5和6现在已被替换为graphical和reboot目标。
的rescue和类似的emergency目标,我们将在本教程中讨论这些目标:它们对于修复某些紧急情况非常有用。
(adsbygoogle = window.adsbygoogle || [])。push({});
紧急目标
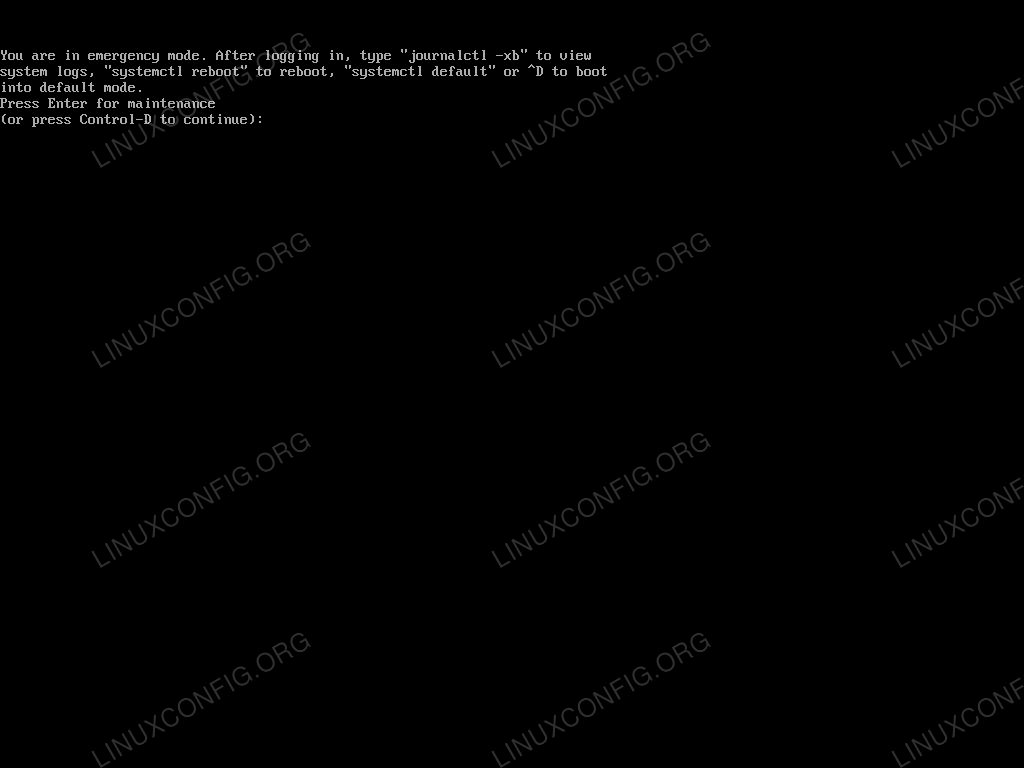
的emergency目标是可以引导系统的最小环境。
达到此目标后,将在主控制台上启动紧急 shell 。
除此之外,只有systemd本身可供用户使用:仅挂载根文件系统(处于只读模式),并且不启动任何服务(这也意味着您将无法访问网络)。
这是引导过程无法成功完成时(例如,文件系统检查失败时)的目标。
紧急目标的定义方式
要检查如何定义紧急目标,我们必须检查专用系统unit。
我们可以使用systemctl cat命令来完成此任务:
$ systemctl cat emergency.target

# /lib/systemd/system/emergency.target
#  This file is part of systemd.
#
#  systemd is free software; you can redistribute it and/or modify it
#  under the terms of the GNU Lesser General Public License as published by
#  the Free Software Foundation; either version 2.1 of the License, or
#  (at your option) any later version.

[Unit]
Description=Emergency Mode
Documentation=man:systemd.special(7)
Requires=emergency.service
After=emergency.service
AllowIsolate=yes
从上面的输出中可以看到,Emergency.target需要相关的Emergency.service作为依赖。我们也来看看它:
$ systemctl cat emergency.service

# /lib/systemd/system/emergency.service
#  This file is part of systemd.
#
#  systemd is free software; you can redistribute it and/or modify it
#  under the terms of the GNU Lesser General Public License as published by
#  the Free Software Foundation; either version 2.1 of the License, or
#  (at your option) any later version.

[Unit]
Description=Emergency Shell
Documentation=man:sulogin(8)
DefaultDependencies=no
Conflicts=shutdown.target
Conflicts=rescue.service
Before=shutdown.target
Before=rescue.service

[Service]
Environment=HOME=/root
WorkingDirectory=-/root
ExecStart=-/lib/systemd/systemd-sulogin-shell emergency
Type=idle
StandardInput=tty-force
StandardOutput=inherit
StandardError=inherit
KillMode=process
IgnoreSIGPIPE=no
SendSIGHUP=yes
服务的定义为我们提供了非常清晰的信息。
首先,HOME环境变量是通过Environment关键字,并且对应于根用户的主目录。
这也是到达Emergency.target时默认使用的工作目录。
启动此服务后,/lib/systemd/systemd-sulogin-shell可执行文件被调用,然后调用/usr/sbin/sulogin,负责为我们提供单用户 shell 的登录信息。
(adsbygoogle = window.adsbygoogle || [])。push({});
如何在启动时访问Emergency.target
要强制系统引导至Emergency.target,必须修改grub菜单。
这是非常容易的操作。当出现grub菜单时,只需选择第一个条目,然后按e编辑:
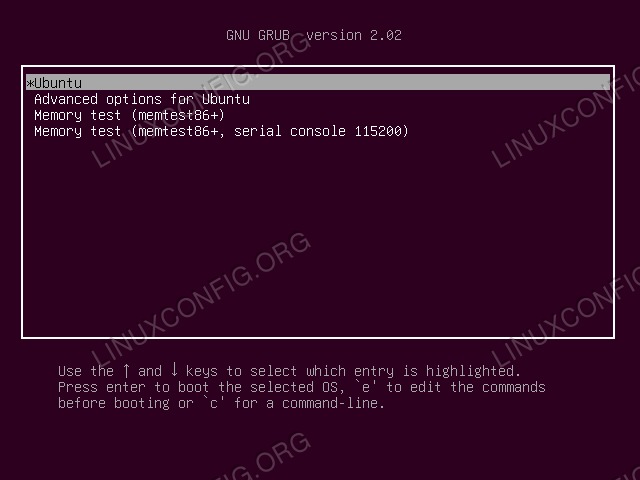
按下e键,您将能够修改引导参数和内核命令行。
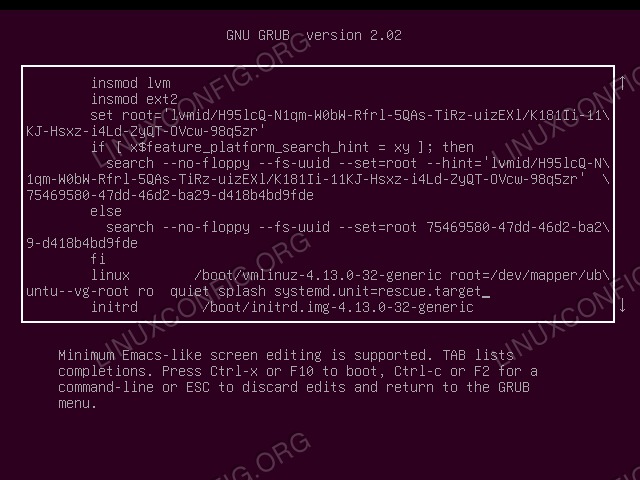
搜索以开头的行linux:
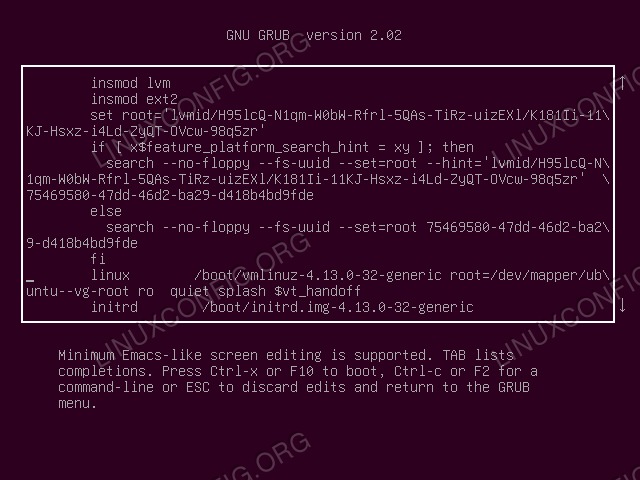
此时,命中CTRL-e到达行尾,删除$vt_handoff并添加systemd.unit=emergency.target指令(您也可以只使用emergency作为别名,以实现SysV兼容性),以便您的行看起来像这样:
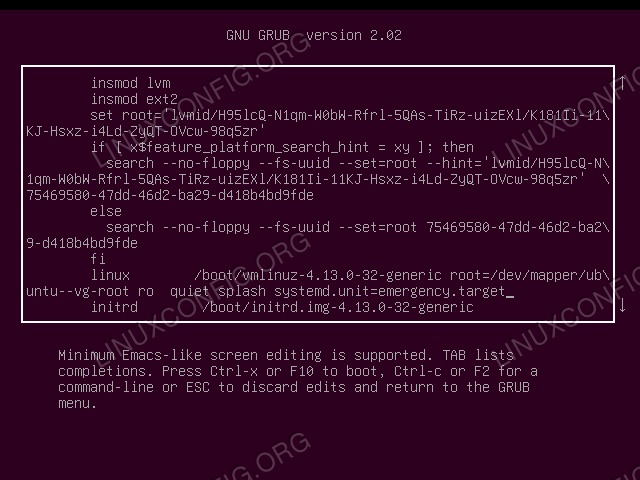
如果现在按CTRL-x要么F10,系统将以紧急模式启动:
救援目标
这是可以与旧的单用户模式关联的systemd目标。
与紧急事件目标不同,到达此目标时,将拉入基础系统:挂载所有文件系统,启动最基本的服务并将其提供给用户。
rescue.target在/lib/systemd/system/rescue.target文件中定义:
# /lib/systemd/system/rescue.target
#  This file is part of systemd.
#
#  systemd is free software; you can redistribute it and/or modify it
#  under the terms of the GNU Lesser General Public License as published by
#  the Free Software Foundation; either version 2.1 of the License, or
#  (at your option) any later version.

[Unit]
Description=Rescue Mode
Documentation=man:systemd.special(7)
Requires=sysinit.target rescue.service
After=sysinit.target rescue.service
AllowIsolate=yes
就像紧急事件所发生的情况一样,抢救目标也需要相关rescue.service,再加上sysinit.target。
前者就像Emergency.service一样,基本上提供了单用户登录,而后者则提取了系统初始化所需的服务(与Emergency.target不同,result.target不仅仅是一个简单的shell)。
(adsbygoogle = window.adsbygoogle || [])。push({});
引导到rescue.target
将系统引导至result.target的过程与使系统引导至紧急目标的过程相同。
唯一需要更改的是添加到内核命令行的参数:我们将使用systemd.unit = emergency.target代替systemd.unit=rescue.target;同样,我们也可以使用别名来实现SysV兼容性,将指令替换为1。
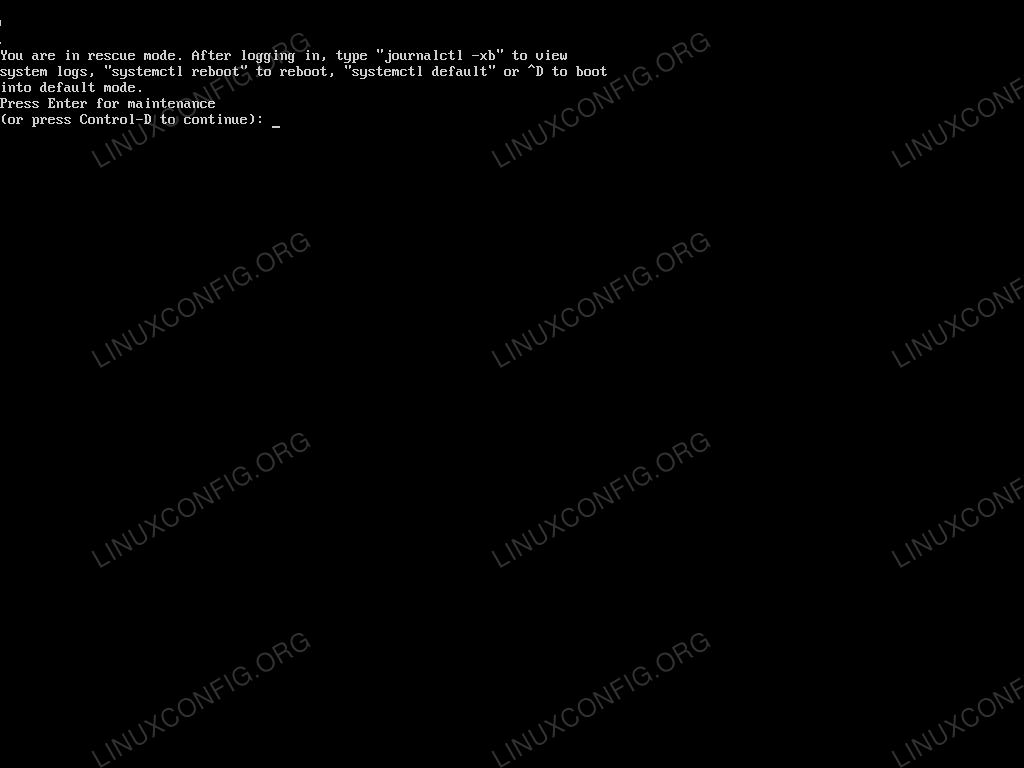
一旦启动,系统将启动到rescue.target,在这里我们可以单用户模式管理系统:
结论
我们迅速检查了系统的紧急救援目标是什么,它们有什么不同以及为用户提供的环境是什么。
我们还看到了如何编辑grub菜单以更改内核命令行并将系统直接引导到这些目标中。
重要的是要说,”isolating”也可以使用systemctl从已经运行的系统中达到systemd目标。
例如,运行:
# systemctl isolate rescue.target将系统带到救援目标。
为了更深入地了解系统special units,我们可以查阅相关的非常清晰的联机帮助页(SYSTEMD.SPECIAL(7))。